Thursday, January 26, 2012

How to Look at Snow in a Whole New Way......

It finally snowed here last week. Mother Nature was kind enough to send the snow on a Friday night, so no cancellation of school was necessary. I thought that was kind. My kids? Not so much.

But I was able to bring a smile to their faces when I asked "Who wants snow pancakes?"

Snow pancakes? Whaaaaa?????

You never heard of snow pancakes? Get ready to rock your world......

Picture perfect snow pancakes

Snow pancakes are one of the easiest things to make - and it really impresses the kids. And any adults that happen to be around, for that matter.

It's from a recipe written long, long ago when eggs were scarce in the winter, but snow was not.

It's really easy. All you do is swap the eggs in any pancake recipe for snow. For every egg, use 2 tablespoons of snow instead. It doesn't have to be an exact measurement, just scoop some up.

Here's the recipe I use:
This is how we gather it.


4 spoons of snow (or 2 eggs)
2 cups flour - I use Trader Joe's white whole wheat
2 cups milk
2 tbs sugar
1/4 cup oil
1 tbs. baking powder


Mix it all together. It will puff up as it sits. Pour some on a griddle, bake until set, flip, bake a bit more - enjoy!

A large griddle makes it easier. Get one.
I've never tried it with boxed pancake mix, but I'm guessing it would work. The recipe above is so easy though, why buy mix?

Be sure to send the kids out to fetch the snow. It's part of the fun. And tell them to get CLEAN snow!

No go look at that recent snowfall in a new light.

By the way, did you know I wrote a book? Chock full of all sorts of ideas like the one above. It's called "30 Days To An Organized Home", and you can get a free sample here. Go - do it now.

 be organized.....evelyn

Thursday, January 19, 2012

How To Hide Your Big Screen TV Without Your Husband Hitting The Roof!

The bane of the big screen TV age.

Your husband wants the biggest TV screen known to man.

While you like watching the big screen, you don't like it staring at you when it's not on, a big black hole sucking the life out of the room.

What to do, what to do.

There are products on the market out there to take care of just this problem - but they're costly.

I'm here to offer a solution. An inexpensive solution.

A cheap, do it yourself, custom made solution that will make you both happy.

The details. Here's my TV. Right smack in the middle of my living room. The first thing you see when you walk into my home.

(Yes - I have a copper colored ceiling. If you want to see more about that, click here.) 

Looks like a picture - right?

Well, it is a picture. All I did was take a canvas, paint a picture on it, and hung it over the TV. Simple & effective. This is what it looks like when we're watching TV.


Here's how you can do it too.

  1. Measure the size of the area you want to cover. My TV has a huge black frame around the actual screen, so I decided to cover just the screen itself.
  2. Order stretcher strips in exactly the size you need from any art supply store, or on line here. You will need 4 - two of the vertical measurement, 2 of the horizontal.
  3. Order a piece of canvas at least 8 inches bigger then the size of your finished picture. Order it primed (means it already has a coating of white on it so you don't have to do it.) Again, an art supply store or here.
  4. Assemble the stretcher strips. Stretch the canvas on the strips. You will need a staple gun for this. (easy directions on how to stretch a canvas here.)
  5. Paint a picture on it with acrylic paints.  Now, don't get intimidated by this. I found a picture in a catalog I liked, and then copied it onto the canvas. You could paint anything you want to - or have the kids do a masterpiece. The point is just get one color on it and have fun! Let dry.
  6. Attach two hooks to the back. 2 wreath hangers work well for this. I made some hooks out of some strips of metal I had in the basement.  
  7. Screw the hooks to the back of the picture.
  8. Apply some cushioning of some sort to the inside of the hooks so they won't scratch the TV screen. I used felt adhesive pads.
Taa daa! You're done!

Now, when the TV is not in use, hang the picture over it. And when it is in use, put your picture below it. Mine happened to fit perfectly hanging on the moulding around the fireplace. See what works for you.


Now you have the best of both worlds - big screen TV when you want it,  and decorative picture when you don't. And a great conversation piece too!

In need of more ideas like this one? There's lots more in my book, "30 Days To An Organized Home". Click here for more info.

 be organized.....evelyn

Thursday, January 12, 2012

Does This Drive You Crazy Like It Drives Me Crazy?

I'm convinced that it will be the minor things that completely unhinge us. Am I right? What's on your list?

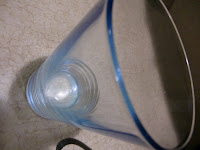
One of the things on my list was spotty glasses. Now I know this sounds trivial, but everyday when I pulled a drinking glass out of the cabinet, it would depress me to see that what was once a shiny sparkling glass was now a cloudy mess. Almost white. Really, really bad. Got to the point where I didn't want to offer a drink to anyone!

Anyway, before you think I'm just a terrible glass washer, let me place the blame where it belongs. It's not my fault.

I live in the Northeast United States. We have really, really hard water. Full of all sorts of wonderful minerals. Minerals that leave your glasses and dishes looking like you never wash them. (This also means that we need to replace all of our faucets every few years. But that's another story for another day.)

Today I'm here to tell you I have found the Holy Grail, the answer to my cloudy glass problem. And it truly is a miracle.

Non toxic.
Cheap.
Easy.
(And no, the answer isn't buy all new glasses. I already did that. Only a temporary fix).

The answer is - common everyday white VINEGAR!

You will not believe how this solves the problem.

The Steps
  1. Get a really big bottle of vinegar. Costco sells it by the gallon jug. Perfect.
  2. Pour the vinegar into a basin or bowl.
  3. Put your glasses in. It's best if you can submerge them, that may require purchasing 2 gallons of vinegar. I put mine in and rolled them around.
  4. Let soak for an hour.
  5. Give a quick scrub - and voila! Your glasses will be sparkling again!
How can it be so easy you ask?
I don't know.
I don't care.
I'm just happy it works.

My second favorite use for vinegar? Getting rid of the hard water deposits from the above mentioned hard water. Just soak a cloth in vinegar, wrap it around the base of the fixture where the deposits accumulate, leave it there for the entire day, then just wipe away the residue.

Again - how does it work? I have no idea. Do I care? Nope.

There are hundreds of uses for vinegar. If you get so excited about your clean glasses & fixtures and just can't stop using it, click here to find out more ways vinegar can be your new best friend.

And for those of you chanting about how I should just get a water softener - I have one. It just hasn't been installed yet. And that's really a story for another day!

By the way, have you purchased my book yet? You really should. It will change your life for the better, give you back your free time and make wonder why you waited. http://www.organizingwithevelyn.com

 be organized.....evelyn

Wednesday, January 4, 2012

The 2 ideas that will make your life happier. & easier.

If nothing else, implement these two systems this month.

You deserve happiness.  

You deserve time to do what you want to do when you want to do it.

These 2 gems will give you that....and more.

Save Your Sanity: http://bestorganizingtips.blogspot.com/2011/12/simple-idea-that-will-save-your-sanity.html

Streamline Your Meals: http://bestorganizingtips.blogspot.com/2011/09/dreading-dinnertime-tonight-heres.html

Looking for more? Get tons of ideas in my book -  just click here for more info.

be organized.....evelyn
Follow Me on Pinterest